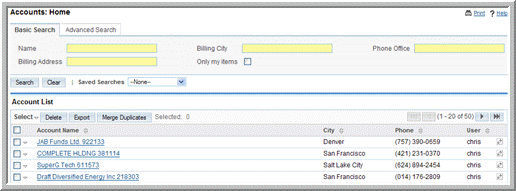
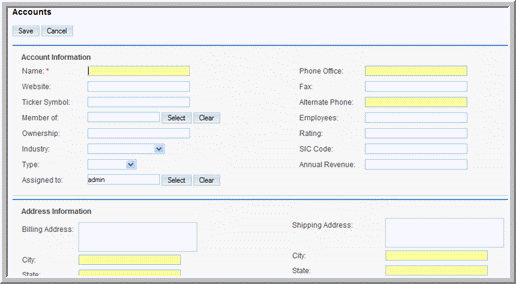
An account contains your customer information such as name and address. Each account can be associated with other records such as opportunities and contacts.The Shortcuts menu displays the following options:Create Account. Click this option to create a new account.Accounts. Click this option to view a list of existing accounts.Import. Click this option to import account information from external systems and data sources. For more information, see “To import data” on page 132.
4. On the Accounts page, enter the following information:Account Name. Enter a name for the account.Phone. Enter the phone number of the organization.Fax. Enter the fax number for the organization.Other Phone. Enter an alternative phone number for the organization, if any.Email. Enter an email address for the organization.Other Email. Enter an alternative email address for the organization.Website. Enter the URL for the organization’s Web site.Ticker Symbol. Enter the stock ticker symbol for the organization.Member of. Enter the names of organization associated with the account.Employees. Enter the number of employees in the organization.Ownership. Specify the owner information.Rating. Enter the organization’s rating in the industry.Industry. From the drop-down list, select the industrial sector to which the account belongs.SIC Code. Enter the Standard Industrial Classification code that indicates your organization’s type of business.Type. Enter the account category such as Customer or Partner.Annual Revenue. Enter the annual revenue for the organization.Assigned to. Enter the name of the individual who is responsible for communicating with the lead. To choose an existing user, click Select, and choose the person from the User List. By default, this is assigned to you.Address Information. Enter the primary address and other address information. To copy the other address from the primary address, select the Copy address from left checkbox.From the account’s Edit View, you can copy the address to one or all contacts associated with the account.Email Address(es): Enter an email address for the organization and your contacts and campaign targets within the organization. If an email address is incorrect, select Invalid to indicate it. If you sent out campaign emails this contact and the individual chose to opt-out of receiving them, select Opted Out.To add an additional email address, click Add Address. You can add multiple email addresses.Description: Enter a brief description for the lead.
5. Click Save to save the new account information; click Cancel to exit the page without saving the information.
• To sort the Accounts list view, click any column title which has theicon beside it; to reverse the sort order, click the column title again.
• To edit or delete all or some accounts on the list, use the Mass Update panel as described in “To edit or delete multiple records” on page 19.The detail page displays sub-panels for related records such as Activities, History, Contacts, Opportunities, and Leads. You can create new records or edit existing ones.
• To pull in data from data sources such as Linkedin, select the data source from the account’s Detail View. For more information on data services, see “Integrating Data from External Sources” on page 20.
• To import records, click Import in the Shortcuts menu of the Home page. For more information on importing data, see “Importing Data” on page 129.
• To export records, select them from the list, click the Export link and follow the process described in “Exporting Data” on page 137.
• To merge duplicates, click the Merge Duplicates link and following the process described in “Merging Duplicate Records” on page 25.
•
• To copy the account’s billing or shipping address to the associated contact records, in the Edit View, click the Copy button, select one or more contacts and click Copy Address to Checked Contacts.
• The system duplicates the account and displays its detail page. Duplication is a convenient way of creating a similar account. You can change the information in the duplicate record to create a new account.
• To track changes to account information, on the account detail page, click View Change Log below the Edit button.
Copyright 2004-2009 SugarCRM Inc.
Sugar Express License