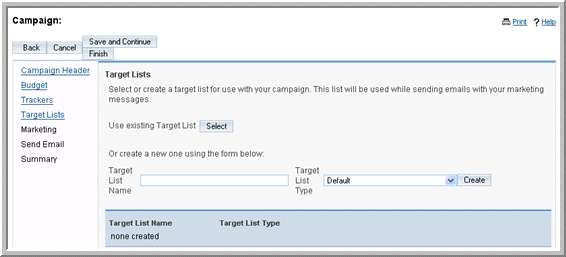
Typically, a mass marketing campaign targets a large group of individuals or organizations. Therefore, the campaign process begins with identifying the targets. You can group multiple targets into a target list according to a set of predetermined criteria such as age group or spending habits.
A target is an individual that you have some information on but does not qualify as a lead or contact. Targets are stand-alone records that are not attached to contacts, leads, or opportunities. However, you can add contacts, leads, and users to a campaign’s target list.
Usually, you create or import a target list first, associate it with targets, and then associate it with a campaign. However, you can also create a campaign first and then associate it with a target list.
A target list can specify either individuals who need to be included in a campaign or excluded from a campaign. You can create one of the following types of target lists:
Default. A list of people who are the campaign targets and receive the campaign email.
Seed. A list of people who need to receive the campaign email but must not be tracked as potential leads. Typically, these are individuals who need to approve the campaign before it is launched.
Test. A list of people who receive the campaign email to test how different email clients display the campaign message before you send it out to the default list.
Suppression List. A list of people you want excluded from the campaign email recipient list. Typically, these are people who chose to opt out of receiving your campaign message. Suppression lists can be by ID, email address, or domain.
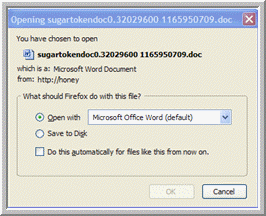
If you have purchased a license for the Sugar Plug-in for Microsoft Word, you can create a form letter in Word for your targets and perform a mail-merge to customize the letter for each target. For more information on Word plug-in, see
Sugar Plug-in for Microsoft Word. For more information on performing a mail merge, see
“Performing a Mail Merge” on page 114.
|
1.
|
From the Shortcuts menu on the Campaigns Home page, click Create Target List.
|
|
2.
|
On the Target Lists page, enter the following information:
|
Name. Enter a name for the target list.
Type. From the drop-down list, select the target list type.
Assigned to. Enter the name of the user assigned to this list; click
Select to select from the User list. By default, it is assigned to you.
Description. Enter a brief description of the target list.
|
3.
|
Click Save to save the target list; click Cancel to exit the page without creating the list.
|
|
1.
|
In the Shortcuts menu, click Create Target.
|
|
2.
|
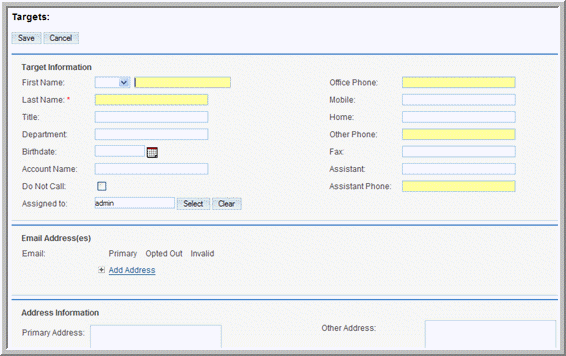
On the Targets page, enter information for the following fields:
|
Mobile. Enter the target’s mobile phone number.
Home. Enter the target’s home phone number.
Other Phone. Enter the alternative phone number, if any.
Fax. Enter the target’s fax number.
Assistant. Enter the target’s assistant’s name.
Department. Enter the name of the department to which the target belongs.
Account Name. Enter the name of the account related to the target.
Do Not Call. Select this box to add the target’s name to the Do Not Call list.
Assigned to. Select the user who has ownership of the account related to the target.
Email Address(es). Enter one or more emails addresses for the contact and select
Primary. If an email address is incorrect, select
Invalid to indicate it. If you sent out campaign emails this contact and the individual chose to opt-out of receiving them, select
Opted Out.
Address Information. Enter the primary address and other address information. To copy information from one section to the other, you can enter the address information on either one of the sections and click the arrow buttons.
|
3.
|
Click Save to create the target; click Cancel to exit the page without creating the target.
|
When you save the target, the target’s detail page displays the Campaign Log sub-panel, which lists all the campaigns that you sent to the target.
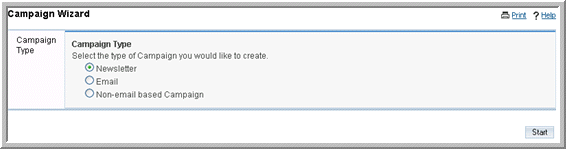
You can create a campaign using the Campaign Classic option or the
Campaign Wizard option. When you use the
Campaign Classic option, you are creating a campaign record but you are not completing related tasks such as specifying the email settings. For more information on creating a campaign using the Classic option, see
“Creating a Campaign” on page 97.
When you use the Campaign Wizard, it guides you through the process of creating the campaign as well as completing related tasks. For more information on creating a campaign with the Campaign Wizard, see
“Using the Campaign Wizard” on page 103.
When you create a campaign such as Mail and Radio, you are creating a record in Sugar for your reference. However, you cannot execute the campaign through Sugar.
When you create an email campaign or a Newsletter campaign, you can execute it through Sugar. In an email campaign, you send out a one-time email with the information that is of interest to your targets. In a newsletter campaign, you email a newsletter to your targets on a regular basis. For example, a newsletter can contain information on product updates. You can send out a newsletter on a weekly, monthly, quarterly, or yearly basis. To measure the campaign’s success, you can view statistics such as the number of targets that responded, the number of opportunities that were created, and the generated revenue.
After you launch an Email or Newsletter campaign, you can view its status to determine its success. For example, you can view how many targets viewed the campaign email, how many clicked any links that were included in the email, and how many leads and contacts were created from the campaign. For more information, see
“Managing Campaigns” on page 108.
For email campaigns, you can embed images in your email templates instead of sending them as attachments. This prevents your emails from being reported as spam. For more information on embedding images, see
“Creating Email Templates” on page 91.
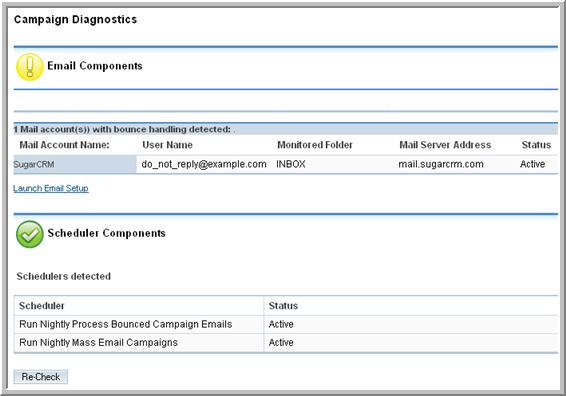
A campaign diagnostic tool is provided to help you ensure that all pending administrative tasks, such as setting up a bounce-handling inbox, have been completed. For more information, see
“Using the Campaign Wizard” on page 103.
|
1.
|
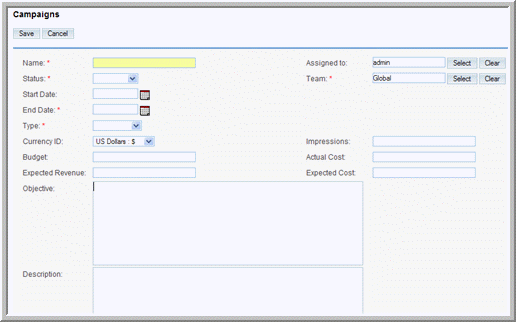
From the Shortcuts menu, select Create Campaign (Classic).
|
Name. Enter the campaign name.
Assigned to. Enter the name of the user assigned to the campaign; to choose a user from the Users list, click
Select, and click the user name.
Status. From the drop-down list, select the current status of the campaign.
Start Date. Click the
Calendar icon and select the date on which the campaign begins.
End Date. Click the
Calendar icon and select the date on which the campaign ends.
Currency. From the drop-down list, select the currency used to calculate the budget, cost, and revenue.
Impressions. Enter the number of page impressions generated from the campaign. You will need to fill in this field after the campaign has commenced.
Budget. Enter the budget for the campaign.
Actual Cost. Enter the actual cost incurred to conduct the campaign.
Description. Enter a brief description of the campaign.
|
3.
|
Click Save to save the campaign; click Cancel to return to the Campaigns home page without creating the campaign.
|
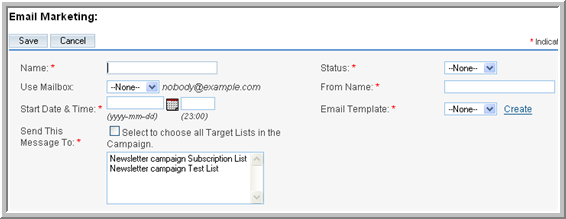
When you create an email campaign, you must also create an email marketing record that contains information such as the campaign target list, the campaign email template, and the inbox to handle emails that bounce back to you. You must specify the email marketing start date and time that is in the past to queue it for delivery. Any emails that bounce back are sent to the From address defined in this record.
|
2.
|
On the Email Marketing page, enter information for the following fields:
|
Name. Enter a name for the record.
Status. From the drop-down list, select
Active if the record is in use; select
Inactive if the record is not in use. Only active records will be queued for campaign launch.
Use Mailbox. From the drop-down list, select a mailbox that is set up for Bounce Handling.
From Name. Enter the name of the organization or person that is sending out the email.
Start Date & Time. Click the
Calendar icon and select a date to send out the email. Enter the time in the adjoining field.
Email Template. From the drop-down list, select an existing email template; to create a new template or edit an existing one, click the adjoining
Create or
Edit link respectively.
Send This Message to. Select one or more target lists from the box below; to send it to all the target lists in the box, select the
All Target Lists in the Campaign box.
A campaign email can contain not only the campaign message but also images and links. Links can direct targets to other URLs such as an external Web site or a
.php file on your system.
You can use one or more tracker URLs in your campaign emails to track the response to your campaign. The system generates a unique key for each URL and for each recipient and associates it with the email template. When recipients open the email and click on a URL link, the system, using the unique key identifier, track each action by each recipient.
You can also provide a link to allow targets to unsubscribe themselves from your campaign mailing list. You can embed an “Unsubscribe” link in a tracker URL. When targets click on this URL to unsubscribe from your campaign emails, the system logs the action for your records.
|
2.
|
On the Campaign Trackers page, enter information for the following fields:
|
Tracker Name. Enter a tracker name for your reference; use alpha-numeric characters.
Tracker URL. Enter the tracker URL; for example,
http://www.sugarcrm.com.
Opt-out Link? Select this box to embed your “Unsubscribe” instructions in a tracker URL. By default, the system uses the
removeme.php file which contains these instructions, and displays this file name in the Tracker URL field.
|
1.
|
In the Shortcuts menu of the Campaigns module, click Campaign Wizard.
|
|
•
|
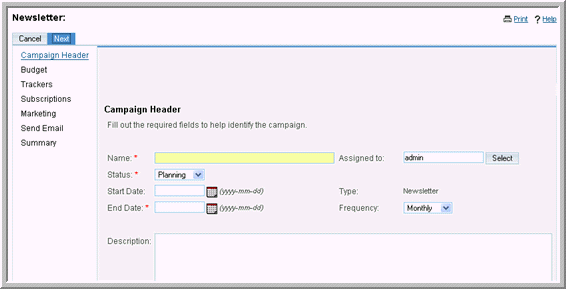
Name. Enter the campaign name.
|
|
•
|
Status. From the drop-down list, select the current state of the campaign.
|
|
•
|
Assigned to. Enter the name of the user who is assigned to the campaign. To select from the Users list, click Select. By default, it is assigned to you.
|
|
•
|
Type. If you are creating a non-email campaign, select the campaign type from the drop-down list.
|
|
•
|
Frequency. This field displays only for newsletter campaigns. From the drop-down list, select the intervals at which the newsletter will be emailed to targets.
|
|
•
|
Start Date. Enter the campaign start date; click the Calendar icon to select the date.
|
|
•
|
End Date. Enter the campaign end date; click the Calendar icon to select the date.
|
|
•
|
Description. Optionally, enter a brief description of the campaign.
|
|
4.
|
Click Next to enter the campaign budget information. 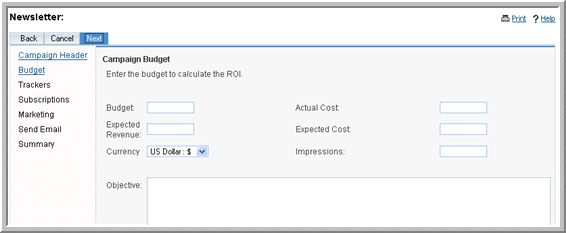
|
|
•
|
Budget. Enter a numerical value for the campaign budget.
|
|
•
|
Currency. From the drop-down list, select the currency used for the campaign.
|
|
6.
|
Click Next to enter the tracker URL information. 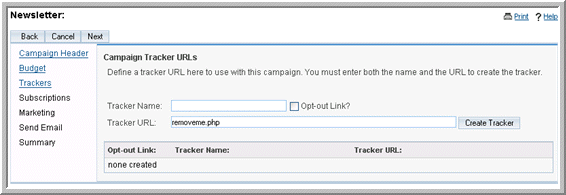
|
Opt-out link? Select this box to create an opt-out tracker that allows targets to unsubscribe from your email campaigns.
|
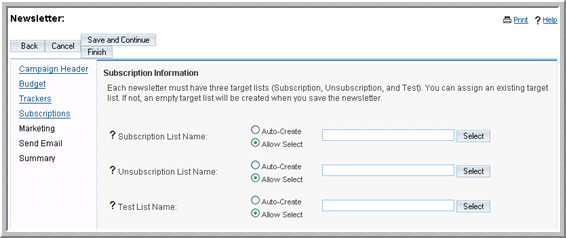
•
|
Test list: These targets are the recipients of the test email that you send out to ensure it is successful.
|
When you click Finish, the campaign’s detail page displays on the screen.
Executing an email campaign or a newsletter campaign involves several steps, some of which can be performed only by your administrator. The campaign diagnostic tool enables you to check if all pending administrative tasks have been completed before you attempt to launch the campaign.
|
1.
|
In the Shortcuts menu of the Campaigns module, click Diagnostics.
|
The Campaign Diagnostics page displays on the screen.
To test a campaign click Send Test and on the Campaign’s detail page, select the message, and click
Send. Ensure that you are sending out the campaign to the Test target list.
Note that in test mode, the system disables your suppression lists. Therefore, the campaign message is sent to targets on your suppression lists. The system also disables checks for duplicate email addresses, thereby allowing users to send a message multiple times.
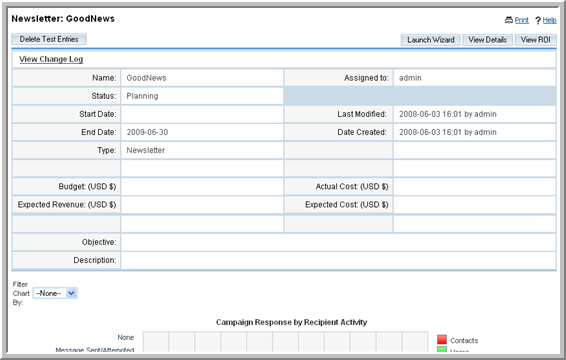
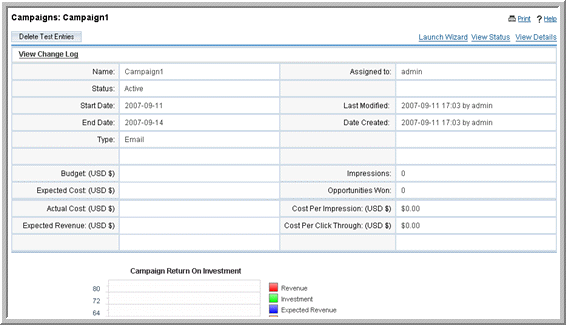
After you launch a campaign, you can view the campaign status to determine its success. From a campaign’s detail page, you can view the status and the result of the campaign such as the number of generated leads and the return on investment (ROI). This enables you to evaluate the effectiveness of the campaign and to take further action. For example, you can add targets that opted out of the campaign to the Unsubscription target list to ensure that they are not recipients of campaign emails in the future.

For any campaign that you execute, Sugar provides an embedded ROI report based on the “Closed/Won” opportunities generated from the campaign. You can view this report from the campaign’s detail page.
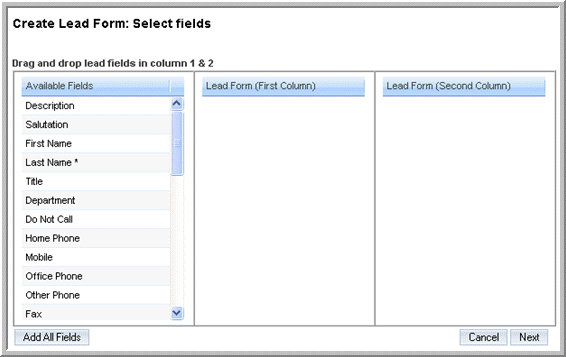
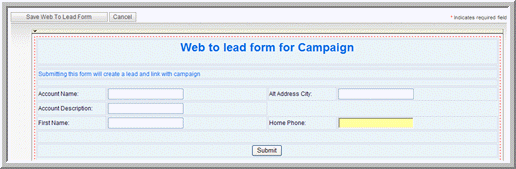
To capture leads from Web-based campaigns or other Web-based sources such as your Website, you can create a Web-to-Lead form. When campaign targets fill in the form and submit it, the system saves it as lead information in the Sugar database. You can then use this lead information to generate more opportunities for your organization.
When you generate a Web-to-Lead form, it is saved to the cache/generated_forms folder, from where you can copy it to other locations. You can view and edit generated forms in the FCKEditor. To add new fields to the form, the administrator must first create new fields for the Leads module in Studio so that users can select them when they create the form.
|
1.
|
In the Shortcuts menu of the Campaigns module, click Create Lead Form.
|
The Form Properties page displays on the page.
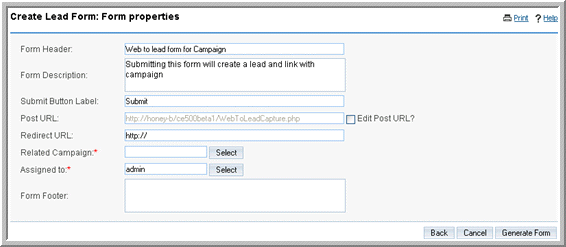
Form header. The default header displays. You can delete it and enter the desired header information.
Submit button label. The default label displays on the page. You can delete it and enter the desired label.
Post URL. The default location where the lead information will be stored displays on the page. To edit this information, select the Edit post URL? box and then enter the new location.
Related campaign. Enter the name of the campaign that is related to this lead form. To select from the Campaigns list, click
Select.
Assigned to. Enter the name of the user who is assigned to this form. To select from the Users list, click
Select.
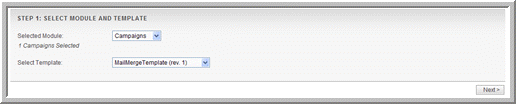
You can create a form letter template for campaigns using the Sugar Plug-in for Microsoft Word and merge it with your target list to create personalized letters for each target. Typically, you perform mail merge for non-email campaigns.


icon beside it; to reverse the sort order, click the column title again.